32. OpenGL Particle Engine (Version 2.0)
Introduction
Particle systems are an essential tool in graphics programming, used to simulate effects like fire, smoke, explosions, or even magic spells in OpenGL. They consist of numerous small, independently moving objects (particles) that together create complex visual effects.
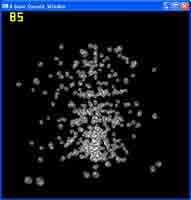
In this tutorial, we’ll build a simple particle engine that generates, updates, and renders particles in real-time. This example uses textured quads to represent particles and allows customisation of their movement, colour, size, and more. By understanding the basics here, you’ll be able to expand the system for more advanced effects.
Understanding Particle Properties
Each particle is defined by a set of properties that govern its position, movement, appearance, and behaviour. In our implementation, we use a structure (PARTICLES) to encapsulate these properties:
typedef struct {
    double Xpos, Ypos, Zpos; // Position coordinates
    double Xmov, Zmov;       // Movement speed along X and Z axes
    double Red, Green, Blue; // Colour components
    double Direction;        // Rotation angle
    double Acceleration;     // Upward acceleration
    double Deceleration;     // Downward deceleration
    double Scalez;           // Scale factor for size
} PARTICLES;
- Position (Xpos, Ypos, Zpos): Determines where the particle is in 3D space.
- Movement (Xmov, Zmov): Specifies how fast the particle moves horizontally or along the depth axis.
- Colour (Red, Green, Blue): Defines the particle’s colour using RGB values.
- Rotation (Direction): Adds a spinning effect to the particle.
- Acceleration and Deceleration: Controls the particle’s upward and downward motion over time.
- Scale (Scalez): Changes the size of the particle, allowing for variety in appearance.
Initialising Particles
Before rendering, we initialise the particles with random properties. This adds variety, making the system look dynamic and natural. The glCreateParticles function does this:
void glCreateParticles(void) {
    for (int i = 0; i < ParticleCount; i++) {
        Particle[i].Xpos = 0;   // Start at the origin
        Particle[i].Ypos = -5;  // Start below the visible area
        Particle[i].Zpos = -5;  // Start away from the viewer
        Particle[i].Xmov = ((rand() % 10) - 5) * 0.01; // Random X movement
        Particle[i].Zmov = ((rand() % 10) - 5) * 0.01; // Random Z movement
        Particle[i].Red = 1;    // Full red
        Particle[i].Green = 1;  // Full green
        Particle[i].Blue = 1;   // Full blue
        Particle[i].Scalez = 0.25; // Smaller size
        Particle[i].Direction = 0; // No initial rotation
        Particle[i].Acceleration = (rand() % 5 + 5) * 0.02; // Random upward speed
        Particle[i].Deceleration = 0.0025; // Initial deceleration
    }
}
Code Explanation:
- rand(): Generates random values for properties like movement, acceleration, and colour. This ensures that each particle behaves uniquely.
- Position Initialisation: All particles start at the same origin point and spread outward due to their random movement values (Xmov, Zmov).
- Scaling and Rotation: Setting all particles to the same scale and rotation simplifies the initial setup. These can be varied dynamically later.
Animating Particles
To create the illusion of movement, we update each particle’s properties every frame. This is handled by the glUpdateParticles function:
void glUpdateParticles(void) {
    for (int i = 0; i < ParticleCount; i++) {
        // Update position
        Particle[i].Ypos += Particle[i].Acceleration - Particle[i].Deceleration;
        Particle[i].Xpos += Particle[i].Xmov;
        Particle[i].Zpos += Particle[i].Zmov;

        // Increase deceleration for downward motion
        Particle[i].Deceleration += 0.0025;

        // Update rotation
        Particle[i].Direction += (rand() % 5) * 0.1;

        // Reset particle if it falls below starting position
        if (Particle[i].Ypos < -5) {
            Particle[i].Ypos = -5;
            Particle[i].Xpos = 0;
            Particle[i].Zpos = 0;
            Particle[i].Deceleration = 0.0025;
            Particle[i].Acceleration = (rand() % 5 + 5) * 0.02;
        }
    }
}
Code Explanation:
- Particle[i].Ypos: Adjusts the vertical position based on acceleration (upward) and deceleration (downward). This creates a natural rise-and-fall motion.
- Particle[i].Xpos, Particle[i].Zpos: Moves the particle in the X and Z directions, creating lateral motion.
- Particle[i].Deceleration: Gradually increases, causing the particle to fall faster over time, mimicking gravity.
- Particle Reset: When a particle falls out of view, its properties are reset to simulate a continuous system.
Rendering Particles
Particles are drawn as textured quads. Each quad’s transformation (position, rotation, and scale) is applied individually to maintain its unique behaviour.
void glDrawParticles(void) {
    for (int i = 0; i < ParticleCount; i++) {
        glPushMatrix();

        // Apply particle transformations
        glTranslatef(Particle[i].Xpos, Particle[i].Ypos, Particle[i].Zpos);
        glRotatef(Particle[i].Direction, 0, 0, 1);
        glScalef(Particle[i].Scalez, Particle[i].Scalez, Particle[i].Scalez);

        // Draw particle quad
        glDisable(GL_DEPTH_TEST);
        glEnable(GL_BLEND);
        glBlendFunc(GL_DST_COLOR, GL_ZERO);
        glBindTexture(GL_TEXTURE_2D, texture[0]);
        glBegin(GL_QUADS);
        glTexCoord2d(0, 0); glVertex3f(-1, -1, 0);
        glTexCoord2d(1, 0); glVertex3f(1, -1, 0);
        glTexCoord2d(1, 1); glVertex3f(1, 1, 0);
        glTexCoord2d(0, 1); glVertex3f(-1, 1, 0);
        glEnd();

        glEnable(GL_DEPTH_TEST);
        glPopMatrix();
    }
}
Code Explanation:
- Transformations: Each particle’s position, rotation, and scale are applied using glTranslatef, glRotatef, and glScalef. These ensure that particles are drawn in their correct location and size.
- Texturing: Textures are applied to the quads to give the particles a realistic look.
- Blending: The blending functions (glBlendFunc) create transparency effects, essential for natural-looking particles like smoke or fire.
Tutorial Code
Here’s the full program for creating, updating, and rendering particles:
#include <GL/gl.h>
#include <GL/glut.h>
#include <cstdlib> // For rand()

// Number of particles in the system
const int ParticleCount = 500;

// Structure to hold individual particle properties
typedef struct {
    double Xpos, Ypos, Zpos; // Position
    double Xmov, Zmov;       // Movement
    double Red, Green, Blue; // Colour
    double Direction;        // Rotation angle
    double Acceleration;     // Upward speed
    double Deceleration;     // Downward speed
    double Scalez;           // Scale
} PARTICLES;

// Array to store all particles
PARTICLES Particle[ParticleCount];

// Texture array for particle rendering
GLfloat texture[10];

// Function prototypes
void glCreateParticles(void);
void glUpdateParticles(void);
void glDrawParticles(void);

// Initialise the particle system
void glCreateParticles(void) {
    for (int i = 0; i < ParticleCount; i++) {
        Particle[i].Xpos = 0;   // Start at the origin
        Particle[i].Ypos = -5;  // Start below the visible area
        Particle[i].Zpos = -5;  // Start away from the viewer
        Particle[i].Xmov = ((rand() % 10) - 5) * 0.01; // Random X movement
        Particle[i].Zmov = ((rand() % 10) - 5) * 0.01; // Random Z movement
        Particle[i].Red = 1;    // Full red
        Particle[i].Green = 1;  // Full green
        Particle[i].Blue = 1;   // Full blue
        Particle[i].Scalez = 0.25; // Smaller size
        Particle[i].Direction = 0; // No initial rotation
        Particle[i].Acceleration = (rand() % 5 + 5) * 0.02; // Random upward speed
        Particle[i].Deceleration = 0.0025; // Initial deceleration
    }
}

// Update particle properties for animation
void glUpdateParticles(void) {
    for (int i = 0; i < ParticleCount; i++) {
        // Update position
        Particle[i].Ypos += Particle[i].Acceleration - Particle[i].Deceleration;
        Particle[i].Xpos += Particle[i].Xmov;
        Particle[i].Zpos += Particle[i].Zmov;

        // Increase deceleration for downward motion
        Particle[i].Deceleration += 0.0025;

        // Update rotation
        Particle[i].Direction += (rand() % 5) * 0.1;

        // Reset particle if it falls below starting position
        if (Particle[i].Ypos < -5) {
            Particle[i].Ypos = -5;
            Particle[i].Xpos = 0;
            Particle[i].Zpos = 0;
            Particle[i].Deceleration = 0.0025;
            Particle[i].Acceleration = (rand() % 5 + 5) * 0.02;
        }
    }
}

// Render all particles
void glDrawParticles(void) {
    for (int i = 0; i < ParticleCount; i++) {
        glPushMatrix(); // Save the current transformation state

        // Apply particle transformations
        glTranslatef(Particle[i].Xpos, Particle[i].Ypos, Particle[i].Zpos);
        glRotatef(Particle[i].Direction, 0, 0, 1);
        glScalef(Particle[i].Scalez, Particle[i].Scalez, Particle[i].Scalez);

        // Draw particle quad with texture
        glDisable(GL_DEPTH_TEST);
        glEnable(GL_BLEND);
        glBlendFunc(GL_DST_COLOR, GL_ZERO);
        glBindTexture(GL_TEXTURE_2D, texture[0]);
        glBegin(GL_QUADS);
        glTexCoord2d(0, 0); glVertex3f(-1, -1, 0);
        glTexCoord2d(1, 0); glVertex3f(1, -1, 0);
        glTexCoord2d(1, 1); glVertex3f(1, 1, 0);
        glTexCoord2d(0, 1); glVertex3f(-1, 1, 0);
        glEnd();

        // Enable depth testing and restore transformations
        glEnable(GL_DEPTH_TEST);
        glPopMatrix();
    }
}

// Display function
void display(void) {
    glClear(GL_COLOR_BUFFER_BIT | GL_DEPTH_BUFFER_BIT);
    glLoadIdentity();
    glTranslatef(0, 0, -10); // Move camera back

    glUpdateParticles(); // Update particle positions
    glDrawParticles();   // Render particles

    glutSwapBuffers(); // Swap buffers for smooth animation
}

// Initialise OpenGL settings
void init(void) {
    glEnable(GL_TEXTURE_2D);  // Enable 2D textures
    glEnable(GL_DEPTH_TEST);  // Enable depth testing
    glCreateParticles();      // Initialise particles
    // Load textures here (use your texture loading function)...
}

// Main entry point
int main(int argc, char **argv) {
    glutInit(&argc, argv);
    glutInitDisplayMode(GLUT_DOUBLE | GLUT_RGBA | GLUT_DEPTH);
    glutInitWindowSize(500, 500);
    glutCreateWindow("Particle Engine");
    init();
    glutDisplayFunc(display);
    glutIdleFunc(display); // Continuously update
    glutMainLoop();
    return 0;
}
Source & downloads
Questions or corrections? If something doesn’t work or you spot something I’ve got wrong, leave a comment below. These tutorials have been around a long time, so useful corrections are always welcome!

I am trying to change this to act as a water fountain and I’m having a hard time making the particle have some sort of parabola behavior. Like it’ s kind of random at the moment.
I’m affecting this to limit the height and the width of the particle but it’s not working.
if ((Particle[i].Ypos 2) && (Particle[i].Xpos 1) && (Particle[i].Zpos 2)) //remake itself y-something instead of -5, create y and x and z bounds with ||
Someone please help please
Hi,
Just busy working through this tutorial and was just curious if it is intentional that you loop through your particles starting with i = 1 rather than i = 0?
I’m pretty new to openGL. I’ve compiled and run your code, but i’m not able to colour the particles separately. Either all are red, or all are blur and so forth. Please suggest a way to colour them separately. Thank you.
I’m pretty new to openGL. I’ve compiled and run yo the above code but the particles are all black and white. They don’t seem to get coloured. Could you please help me on this.
why the raw file cannot be loaded?tq
Thanks for writing these tutorials!!! I have worked my way through almost all of them now.
A question I have about this tutorial is that you mentioned that it runs at 80 frames per second but when I run this on my computer it is all a blur.
I added the line (and the library unistd.h):
usleep(10000 – glutGet(GLUT_ELAPSED_TIME)/1000) % 10000);
right before glutSwapBuffers();
I think this gets me to 100 frames per second, is there a better way to do this?
Thanks.
Hey Mark,
It will run at whatever speed your system will support. The best way to keep it all at a common speed is to switch to time based movement, so that everything you do is based on the current elapsed time. There is plenty of information on the Internet about this, but feel free to get back to me if you have any issues.
Cheers,
Swiftless
I have to say, big fan of your tutorials. This one in particular really made my day.
Best tutorials since Nehe. (I switched over to yours because you don’t use glaux)
Thanks.
Hello
Good tutorial.
Why you cannot change the color to 0.1, 0.2, 0.3… ?
it worked for me.
Aslam o alkum,, can you give me full tutorial of particle engine in opengl … because I am new in using opengl .. plz help me in this matter
Dude. Ive learnt alot from this site. Its sick. But, my particle system runs and no errors are coming up but the display is blank, just the black background. The warning messages ‘Cannot find or open the PDB file’, do come up but i heard that does’nt effect the program and i have no idea and don’t want to know about symbol servers at the minute. Can you help me? Seriously sick tutorials every other one, and I’ve nearly done all of them are sweet. Particle systems have a history of beating me, desperate to figure them out. Many Thanks.
Hey Sean,
That PDB message won’t effect the final output of the application. I’m not quite sure what could be causing the problem. My first guess would be, is it loading the textures correctly?
Cheers,
Swiftless
Oh, sorry 🙂 I think about cstdlib header file.
Hello! I think You should add line:
#include
for rand().